Install
System Requirements
SEISMIC-RNA runs on Linux and macOS. If you use Windows, we recommend installing and running SEISMIC-RNA using the Windows Subsystem for Linux (WSL).
Option 1: Install with Conda, if you already know how to use it
SEISMIC-RNA is available from the Bioconda channel and compatible with Python 3.11 and later.
To install, type this into a terminal:
conda create -n seismic python=3.14
conda activate seismic
conda install -c bioconda -c conda-forge seismic-rna
If installing with Conda fails, then try Option 3: Install with Conda, if conda install seismic-rna fails.
After you have installed SEISMIC-RNA, Appendix 3: Set the DATAPATH environment variable and (optionally) Appendix 4: Test SEISMIC-RNA.
Option 2: Install with Conda, if you don’t know how to use it
Conda provides the easiest way to install SEISMIC-RNA. These steps explain how to install Conda, SEISMIC-RNA, and its dependencies.
Step 1: Install Conda
Installing SEISMIC-RNA is easiest with Conda, a popular package manager.
If you don’t already have Conda, then we recommend installing a small version of
it called Miniconda.
When the installer asks if you want to initialize Conda, choose yes.
Otherwise, you can initialize Conda later by typing the path to your conda
executable followed by init, e.g.
~/miniconda3/bin/conda init
Note
Another popular package manage is Mamba, which is a drop-in replacement
for Conda reimplemented in C++. It can be much faster than Conda in the
event you plan to install any additional packages alongside SEISMIC-RNA.
If you wish to use Mamba instead of Conda, simply install Mamba and
replace all instances of the conda command in this documentation
with mamba. The default installation location of Mamba is
~/miniforge3/bin/mamba
Step 2: Create a Conda environment for SEISMIC-RNA
Once Conda is installed, create a new virtual environment into which SEISMIC-RNA and all other necessary software will go:
conda create -n seismic python=3.14
You can name your environment whatever you like using the -n option; in this
example, it is named seismic.
Note
We recommend giving your environment a short name because you will need to type its name every time before using it.
You must indicate which version of Python to use; we recommend the most recent stable release (currently version 3.14), though SEISMIC-RNA is compatible with version 3.11 and later.
Step 3: Activate the Conda environment for SEISMIC-RNA
Before you install SEISMIC-RNA into the Conda environment, you must “activate”
the environment by typing conda activate followed by its name, e.g.
conda activate seismic
Warning
Make sure to activate the environment for SEISMIC-RNA before installing any
packages for SEISMIC-RNA.
If you don’t, then you will instead install the packages into whichever
environment was already active, which would not only unintentionally alter
this environment but also fail to install the packages into the seismic
environment.
Step 4: Install SEISMIC-RNA and its dependencies
Run this command to install SEISMIC-RNA and all other software it requires:
conda install -c bioconda -c conda-forge seismic-rna
If installing with Conda fails, then try Option 3: Install with Conda, if conda install seismic-rna fails.
After you have installed SEISMIC-RNA, Appendix 3: Set the DATAPATH environment variable and (optionally) Appendix 4: Test SEISMIC-RNA.
Option 3: Install with Conda, if conda install seismic-rna fails
Conda may fail to install SEISMIC-RNA if some dependencies are not compatible with your hardware and/or operating system (especially for Apple Silicon). If that happens, then first Appendix 1: Install the dependencies of SEISMIC-RNA with or without Conda and subsequently Appendix 2: Install SEISMIC-RNA without Conda.
After you have installed SEISMIC-RNA, Appendix 3: Set the DATAPATH environment variable and (optionally) Appendix 4: Test SEISMIC-RNA.
Option 4: Install without Conda
Although Conda is the easiest means to install SEISMIC-RNA, it is not necessary.
First, if Python is not installed, then install the latest version. Confirm that Python version 3.11 or later and pip are installed by typing the following commands, one by one:
python --version
pip --version
After installing Python and pip, follow Appendix 1: Install the dependencies of SEISMIC-RNA with or without Conda and then Appendix 2: Install SEISMIC-RNA without Conda.
After you have installed SEISMIC-RNA, follow Appendix 3: Set the DATAPATH environment variable and optionally Appendix 4: Test SEISMIC-RNA.
Option 5: Update to another version of SEISMIC-RNA
If you have already installed SEISMIC-RNA, you can install a different version easily.
Option 5A: Update SEISMIC-RNA to the latest stable version
Type this if you had initially installed SEISMIC-RNA with Conda:
conda update -c bioconda -c conda-forge seismic-rna
or this if you had initially installed it with pip:
pip install -U seismic-rna
After updating, it is a good idea to Appendix 4: Test SEISMIC-RNA.
Option 5B: Install a specific version of SEISMIC-RNA
Type this if you had initially installed SEISMIC-RNA with Conda:
conda install -c bioconda -c conda-forge seismic-rna=x.y.z
or this if you had initially installed it with pip:
pip install seismic-rna==x.y.z
Note
When specifying the version, use = with Conda and == with pip.
After updating, it is a good idea to run the tests (see Appendix 4: Test SEISMIC-RNA).
Appendix 1: Install the dependencies of SEISMIC-RNA with or without Conda
Although most dependencies of SEISMIC-RNA are available from pip, several are not:
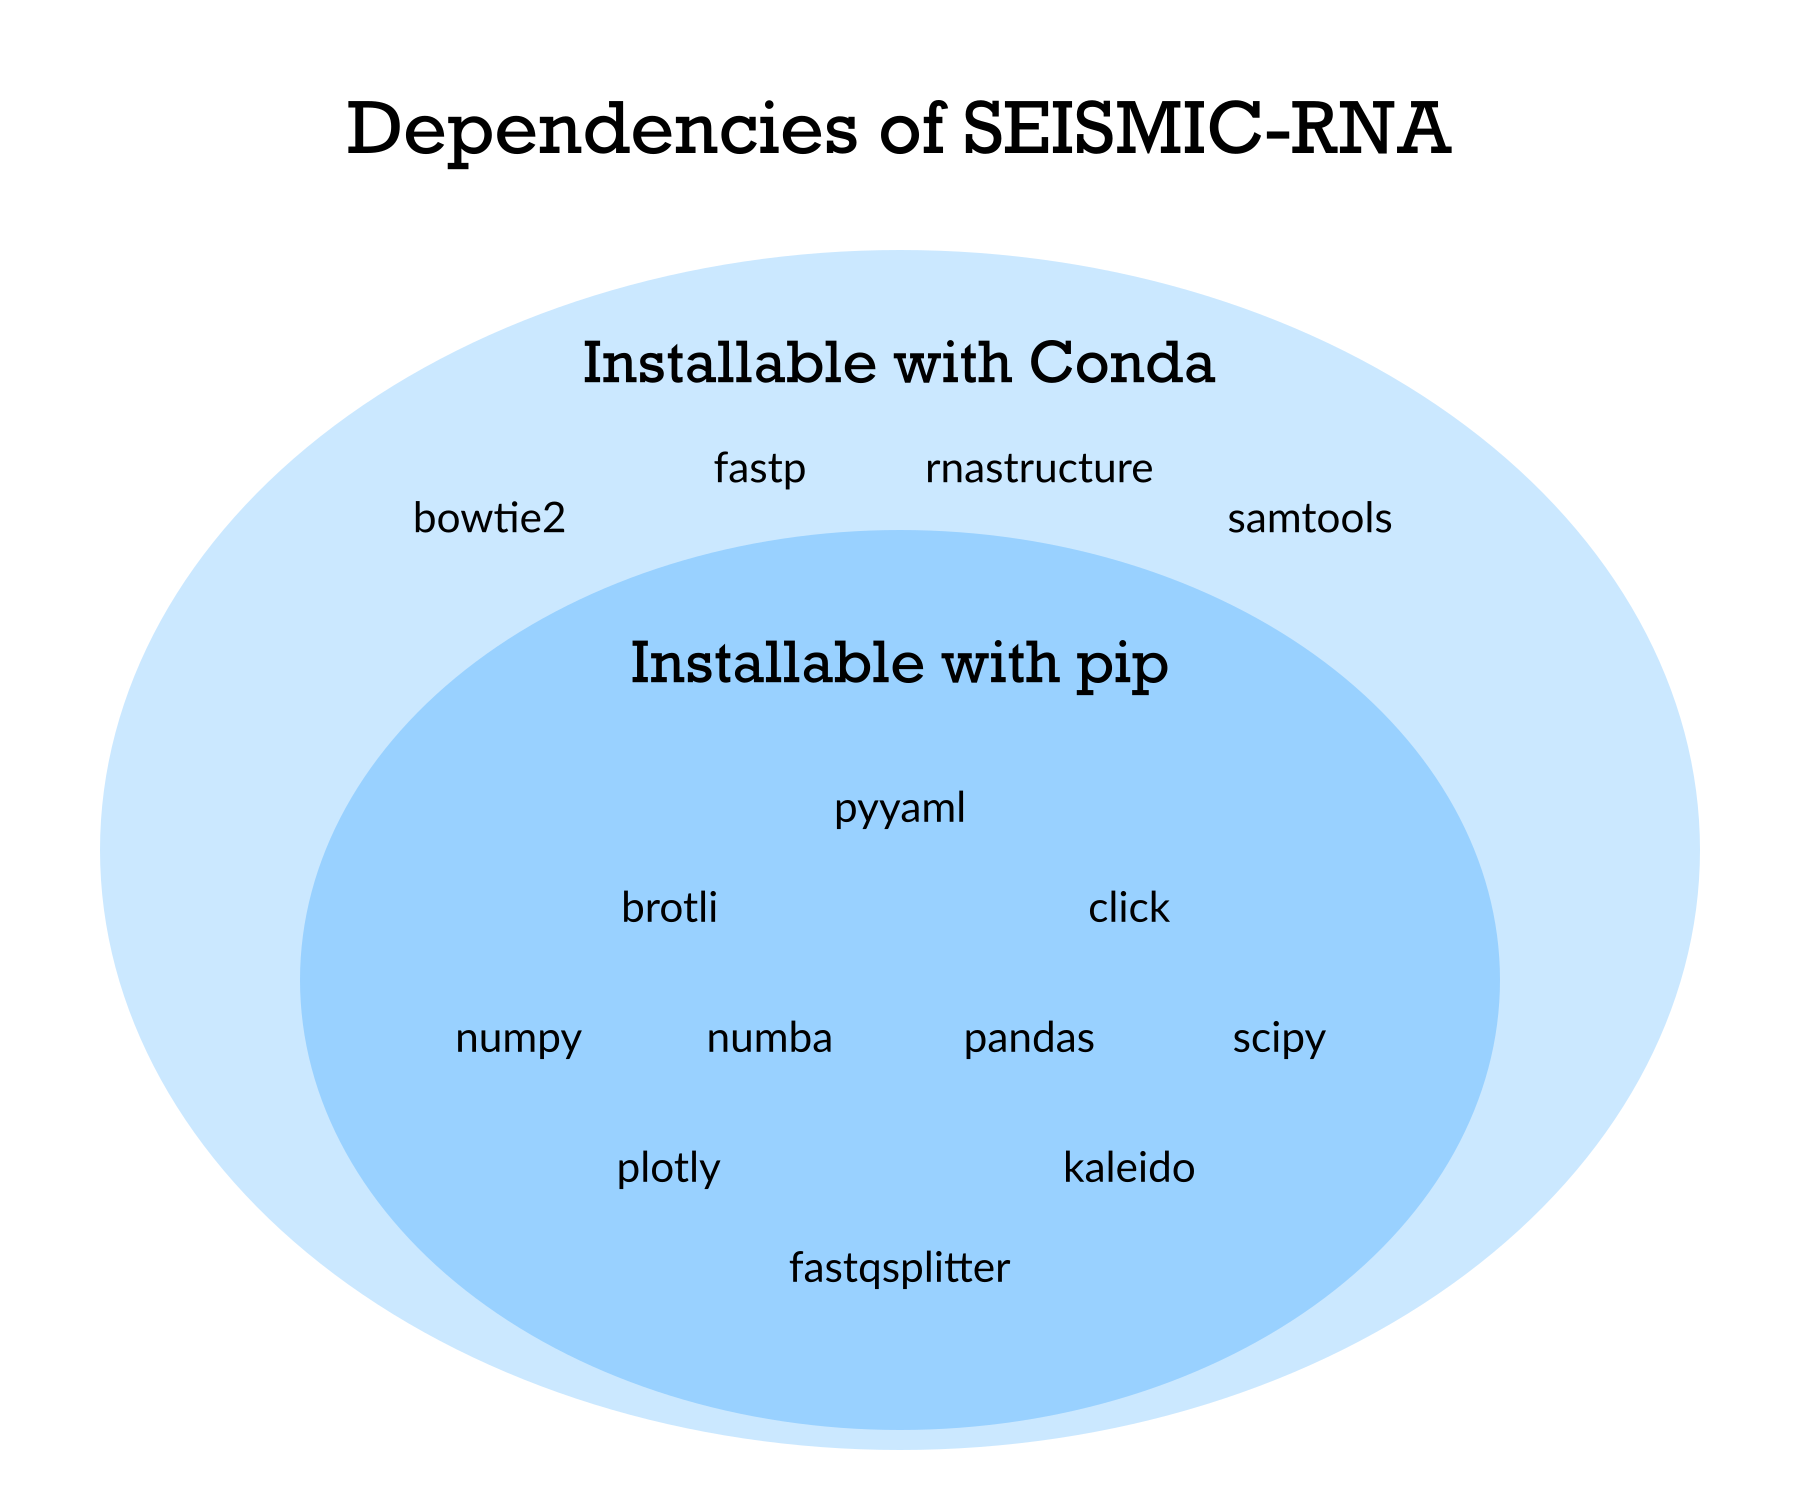
The easiest way to install them is with Conda, using the following commands:
Dependency |
Command to install with Conda |
|---|---|
|
|
|
|
|
|
|
|
|
|
|
Note
RNAstructure (version ≥ 6.6) and seqkit are required for the fold
and demult steps, respectively.
ViennaRNA is optional: it is only needed if you use
--fold-backend viennarna (see seismic fold).
If a package fails to install using Conda, or if you are not using Conda, then follow its link above to find the instructions for installing it manually.
Note
If you use macOS and install software without using Conda, then you will
need to manually approve each piece of software before you can run it.
(This limitation is a safety feature of macOS intended to reduce the risk of
running malware accidentally.)
To approve the software, type which [program] (replacing [program]
from an item on the list below) to find the path of the executable.
Then in Finder, open the directory that contains the executable.
Confirm that each dependency is installed by running each of these commands, one at a time:
which bowtie2
which fastp
which ct2dot  # ct2dot is part of RNAstructure
which samtools
which seqkit
which RNAfold  # RNAfold is part of ViennaRNA (optional)
If the dependency is installed, then it should print out the path to it.
If it says something like not found, then the dependency is not installed.
Appendix 2: Install SEISMIC-RNA without Conda
Option 2A: Install SEISMIC-RNA from the Python Package Index
We recommend installing SEISMIC-RNA from the Python Package Index, which will download the latest stable version that has been released. In a terminal, type this command to install it and all its Python dependencies:
pip install seismic-rna
Option 2B: Install SEISMIC-RNA from GitHub
We do not recommend installing from GitHub unless you need the latest source code (most users do not), which may be unstable or contain significant bugs. In a terminal, navigate to the directory into which to install SEISMIC-RNA. If Git is installed on your computer, then clone the GitHub repository:
git clone https://github.com/rouskinlab/seismic-rna.git
Otherwise, open https://github.com/rouskinlab/seismic-rna in a web browser,
click “Code” then “Download ZIP”, unzip the file after it has downloaded, and
move it to the directory where you want to keep the source code.
To install SEISMIC-RNA, type pip install followed by the path of the source
code directory that you downloaded, e.g.
pip install ~/Downloads/seismic-rna
If you want to be able to modify the source code after you install SEISMIC-RNA
and have those changes come into effect, then add the flag -e, e.g.
pip install -e ~/Downloads/seismic-rna
Otherwise, you may delete the source code after installation to save space.
Appendix 3: Set the DATAPATH environment variable
RNAstructure requires an environment variable called DATAPATH to point to
the directory of thermodynamic data tables.
See https://rna.urmc.rochester.edu/Text/Thermodynamics.html for details.
SEISMIC-RNA should be able to guess the correct DATAPATH if RNAstructure was
installed manually from the website or with Conda, but it will log a warning
message to inform you that it had to guess.
To suppress this warning, you can create an environment variable called
DATAPATH on your system.
To find the location of the data tables for RNAstructure, type
seismic -q datapath
This command should print a message that begins with DATAPATH=.
Add this entire line (including DATAPATH=) to the end of your shell RC file:
~/.bashrc on most Linux systems, ~/.zshrc on most macOS systems.
Restart your terminal for the changes to take effect.
After restarting the terminal, confirm DATAPATH is set by typing
echo $DATAPATH
which should print out the path to the data tables that you found previously.
Now the DATAPATH will be set automatically every time you open the terminal,
unless you remove or edit that line in your shell RC file.
Appendix 4: Test SEISMIC-RNA
SEISMIC-RNA comes with hundreds of tests to verify that it is working properly on your system. We recommend running the tests each time you install or update SEISMIC-RNA.
Step 1: Run SEISMIC-RNA’s testing suite
To run all the tests, type this:
seismic test
To monitor the tests as they run, you can use verbose mode (option -v).
In verbose mode, as each test finishes, it will print . if it succeeds,
F if it fails, E if it errs, and s if it was skipped:
seismic test -v
To print out the name of each test as it runs and check which tests succeed and fail, you can use double-verbose mode:
seismic test -vv
Step 2: Interpret the test results
Regardless of the verbosity, if all tests succeed, then it will print a message similar to this:
Ran 903 tests in 196.699s

OK
Otherwise, it will print the number of tests that failed and a message about each failure. If this happens, then first follow Option 5: Update to another version of SEISMIC-RNA to ensure you are using the latest version of SEISMIC-RNA and its dependencies. If your problem persists, then please report an issue (see Bugs and Requests for instructions).